The “5 C’s” Protocol for Workplace Spills


A leaking drum beside a floor drain can turn from a minor maintenance issue into an environmental incident in minutes. The “5 C’s” protocol gives workers a clear order of action when a spill occurs: control, contain, clean up, collect and communicate. It is a practical framework for trained personnel, but it does not replace your site emergency plan, chemical register, safety data sheet (SDS) or escalation process.
For operations managers, warehouse supervisors and safety teams, the value is simple. A consistent response reduces exposure to people, prevents liquids reaching drains or soil, and makes sure contaminated materials are handled as waste rather than left to create a second hazard.
What is the “5 C’s” protocol?
The 5 C’s protocol is a spill response sequence designed to help workers make sensible decisions under pressure. It is most useful for small, manageable spills where trained staff can respond safely using the correct PPE and spill-control equipment.
The sequence is generally understood as:
- Control the source, if it is safe to do so.
- Contain the spill and protect drains, doorways and exposed areas.
- Clean up using absorbents suited to the substance.
- Collect used absorbents, PPE and contaminated debris for correct disposal.
- Communicate the incident, hazards and follow-up actions.
The order matters. Starting to mop up a spill before stopping the leak wastes absorbent and can spread contamination. Failing to secure drains before beginning cleanup can allow oil, fuel or chemicals to leave the work area entirely.
There is also an important limit: if the substance is unknown, highly toxic, flammable, reactive, producing fumes, entering a waterway, or beyond your team’s training and equipment, do not treat it as a routine spill. Isolate the area, keep people away, raise the alarm and follow the emergency response procedure.
1. Control the source without creating another risk
Control means stopping or reducing the release at its source. That may involve righting an intact container, closing a valve, placing a temporary plug in a damaged drum, shutting down a pump or moving an undamaged container away from the affected area.
This step is only appropriate when it can be completed without exposing the responder to splashes, vapours, fire risk or unstable loads. Workers should check the SDS before handling a known hazardous substance and wear the PPE specified for that chemical and task. Gloves, safety glasses, coveralls and chemical-resistant footwear are not interchangeable products. The right selection depends on the material involved.
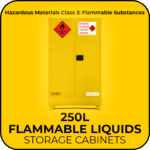
For flammable liquids, remove ignition sources where safe and prevent equipment, vehicles or mobile phones from creating an ignition risk in the immediate area. Do not assume every oil or chemical spill can be approached in the same way. Petrol, solvents, corrosives, coolants and hydraulic oil each require different controls.
If the leak cannot be stopped safely, focus on containment and escalation. A controlled, isolated leak is preferable to an injured worker trying to force a repair.
2. Contain the spill before it reaches drains or stock
Containment limits the area affected and protects the environment. Start by identifying where the liquid is moving, not just where it has pooled. Sloping concrete, expansion joints, vehicle paths and wash-down channels can carry liquids further than expected.
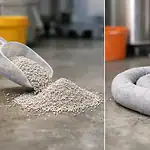
Place drain covers or drain protection first where there is a credible risk of runoff. Then use absorbent socks, booms or loose absorbent to form a barrier around the spill. Position materials ahead of the liquid’s direction of travel, leaving enough room to work safely. For larger spills, build containment in stages rather than walking through the product to create one wide perimeter.
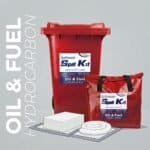
The equipment must match the liquid. General-purpose absorbents are suitable for many workshop and industrial fluids. Oil-only absorbents are designed for hydrocarbons and are commonly used around fuel, diesel, oils and marine applications. Chemical absorbents are intended for more aggressive substances and should be selected with reference to the SDS and site procedure.
Bunding and spill pallets play a preventative role before an incident occurs. Proper secondary containment beneath drums, IBCs and liquid containers can prevent a leak becoming a floor spill in the first place. The 5 C’s protocol works best when the right equipment is already positioned close to the risk.
3. Clean up with compatible absorbents and safe methods
Once the source is controlled and the spill is contained, begin cleanup from the outside edge towards the centre. This reduces the chance of spreading liquid onto clean surfaces. Use pads, rolls, pillows, particulate absorbent or other suitable materials according to the spill size, surface and liquid type.
Avoid using water as a default cleanup method. Washing a spill across a floor can push contaminants into drains, cracks and adjoining work areas. It may also cause a reaction with some substances or make the surface more hazardous. A spill is not necessarily managed just because it is no longer visible.
Use non-sparking tools where flammable liquids are involved, and keep incompatible materials apart. For example, an acid spill should not be handled with a response product intended only for oils. Some sites use neutralisers for specific acids or alkalis, but these should only be used by trained personnel under documented procedures. Neutralisation can produce heat, fumes or a reaction if performed incorrectly.
After bulk liquid has been absorbed, inspect the surrounding area. Check beneath pallets, racking, machinery and vehicles, as well as floor joints and nearby drains. A final wipe-down may be required, but only after the main contamination has been removed and the method is safe for the substance.
4. Collect contaminated materials as waste
Absorbent pads, socks, loose granules, disposable PPE, contaminated tools and damaged packaging may all need to be treated as contaminated waste. They should not be placed in general rubbish bins simply because the visible liquid has been absorbed.
Use suitable bags, overpack drums, salvage drums or sealed waste containers. Label them clearly with the contents and relevant hazard information, then store them in a secure area until disposal can be arranged through an approved waste contractor. Keep incompatible waste streams separate.
The disposal pathway depends on what was spilled. Used oil absorbents, solvent-contaminated materials, corrosive residues and unknown chemicals may have very different handling and transport requirements. Your SDS, waste contractor advice and applicable state or territory requirements should guide the decision.
This stage is often overlooked, particularly after a small spill. Yet leaving a bag of contaminated rags in a workshop corner can introduce fire, vapour and exposure risks long after the original spill has been cleaned up.
5. Communicate, report and prevent a repeat
The final C is communication. Notify the appropriate supervisor, safety representative or environmental contact, even where the spill was cleaned up quickly. Early reporting helps determine whether additional action is needed, such as drain inspection, external notification, medical review, air monitoring or replacement of stock.
Record the substance, estimated volume, location, cause, response materials used, waste generated and any exposure or environmental impact. Photographs can assist where site procedures allow them. This information supports incident investigation and can identify practical improvements, such as relocating a spill kit, fitting a drum tap, upgrading bunding or changing how chemicals are decanted.
Communication should also include restocking. A spill kit is not ready for the next incident if its drain cover, absorbent socks or disposal bags were used and never replaced. Check spill kit contents after every response, not only during scheduled inspections.
Make the protocol usable before a spill happens
The 5 C’s are easy to remember, but workers still need training, clearly marked equipment and authority to act. Place suitable spill kits near workshops, loading areas, fuel points, chemical stores and liquid-handling operations. Make sure staff know which kit is for oil, general-purpose liquids or hazardous chemicals, and that they can locate the SDS without delay.
A short spill drill is often more useful than a folder nobody opens. Use a realistic scenario, such as a leaking 20-litre drum near a drain, and ask the team what they would control first, how they would protect the drain, and who they would notify. Gaps become obvious quickly.
Spillmaster supplies practical spill-control, containment and PPE equipment for worksites that need to respond with confidence. The most effective response is not improvised after a leak starts. It is prepared through suitable storage, fit-for-purpose spill kits, trained people and a clear process that turns the 5 C’s into action.